


17 hours ago
Monday, December 15, 2014
White Chocolate Banana Pudding - No Pictures
WHITE CHOCOLATE BANANA PUDDING – THIS MAKES A LOT! A WHOLE LOT!
INGREDIENTS:
3 BOXES (3.3 OUNCES EACH) INSTANT WHITE CHOCOLATE PUDDING
1 CAN (14 OUNCES) SWEETENED CONDENSED MILK
1 PACKAGE (8 OUNCES) CREAM CHEESE – SOFTENED
2 ½ CUPS MILK DIVIDED (1 ½ & 1 RESPECTIVELY)
1 CONTAINER (16 OUNCES) FROZEN WHIPPED TOPPING
2 BOXES (3.4 OUNCES EACH) INSTANT VANILLA PUDDING
1 CUP (8 OUNCES) SOUR CREAM
2 CUPS HEAVY WHIPPING CREAM
6 MEDIUM BANANAS – THE RIPER THE BETTER – THINLY SLICED (I USED ABOUT 8)
1 BOX (12 OUNCES) VANILLA WAFERS – (I USED 2 BOXES OF THE MINI TYPE)
1. IN A VERY LARGE BOWL COMBINE THE SOFTENED CREAM CHEESE, WHITE CHOCOLATE PUDDING, SWEETENED CONDENSED MILK AND 1 ½ CUPS OF MILK, AND THE WHIPPED TOPPING. BEAT UNTIL SMOOTH. SET ASIDE.
2. IN A LARGE BOWL COMBINE THE 2 BOXES OF VANILLA PUDDING, THE SOUR CREAM, AND THE HEAVY WHIPPING CREAM. BEAT UNTIL SMOOTH
3. LAYER THE VANILLA WAFERS , BANANAS AND THEN THE WHITE CHOCOLATE MIXED STUFF, MORE BANANAS, THEN THE VANILLA MIXED STUFF, TOP WITH MORE VANILLA WAFERS.
4. CHILL IMMEDIATELY. KEEP CHILLED
*** ON THE LAST BATCH THAT I MADE, I FORGOT THE HEAVY WHIPPING CREAM. I ADDED A 3RD BOX OF VANILLA PUDDING & ANOTHER CUP OF MILK & IT WAS FINE! IF YOU PUT THIS IN A TRIFLE DISH YOU HAVE TO MAKE THE LAYERS LOOK REALLY PRETTY – I PUT IT ALL IN 2 ALUMINUM PANS. LAYERS DON’T REALLY MATTER EITHER – BUT YOU HAVE TO COVER UP THE BANANAS OR THEY BROWN REALLY BAD. ALSO – I FOUND IT EASIER TO “SPREAD” THE PUDDING MIXTURES AFTER PUTTING THEM INTO A LARGE ZIP LOCK BAG & CUTTING OFF A TIP & SQUEEZING IT OUT. IT’S NOT HARD, BUT THE BANANAS STICK TO THE PUDDING WHEN YOU’RE TYRING TO “SPREAD” THE PUDDING – IF YOU PIPE IT IN THEN THERE IS VERY LITTLE SPREADING TO DO. THIS IS A VERY POPULAR RECIPE. IT GOES FAST. EVERYONE HAS LOVED IT!
Sunday, December 14, 2014
Glass Etching Tutorial
Glass Etching (No Cricut Method!)
Materials: Glass Dish – Anchor Hocking in this demo 8 X 8 inches
Etching Cream
Exacto Knife
Contact Paper
Paint Brush – Or a foam brush – I used a Q-Tip in this demo
Blue Painters Tape
Sharpie
Popsicle Stick – or other tool to rub with…
Printed desired font. Don’t’ do anything vulgar – this stuff is permanent!

I use this etching cream. I bought it off eBay over many years ago. And it is a brown color. The color of the etching cream is not relevant. This is a pint. I will never EVER use it all. Everything I have read, including the warning label, says to wear gloves & eye protection. I figure if it is stored in PLASTIC it cannot be all that bad….however, Use good judgment & follow the manufacturer’s directions. I will not be held responsible for idiocy.

Exacto Knife. Nice sharp blade. It will cut fingers. I know this. Contact paper. I have & use CLEAR contact paper because #1 it is easy to trace on & #2 it’s what I had on hand. Pretty sure that this stuff that I am using is older than the etching cream because I bought it when the kids were covering books in High School & my youngest child is now 28….so this stuff has a pretty long shelf life.

Make sure that your WORDS are going to fit on the bottom OUTSIDE of the pan you are etching. See my example above. My example was a Christmas gift for my niece. She is young & I wanted something cutsie for her.

In order to get the words readable on the OUTSIDE of the bottom of the pan, you must trace the words BACKWARDS. Place your paper face down on the light box & tape. I used painters tape because it comes off with no residue. Cut a piece of contact paper larger than your paper & tape the contact paper on top of your printed paper. Make SURE that the shiny side is UP & facing YOU.
 Here you see how I have meticulously (yah right) traced the outline of the words on my paper. Do not waste your time filling in the letters.
 In this picture, I am showing you the BOTTOM of the glass pan.
Peel the paper OFF the contact paper & place the contact paper ON the pan. Sticky side ON THE GLASS.
 In this picture, you can see that I have peeled the paper off & stuck the contact paper on the bottom of the pan. As you can see, it is still backwards. But only if you are looking at it from the backside, it’s right side up when you are looking at the pan from the top!
See? (below pic) Right Side Up!

Now, make sure you have GOOD lighting & take that super sharp exacto knife & start cutting out the letters. Go slow. Small strokes allow you to cut the teeny tiny pieces out. Use the tip of the knife to remove the contact paper.
 Once you have all the letters cut out – use your popsicle stick to sort of BURNISH, or rub, all the edges of the letters down. If you skip this step, you will regret it. Most pans have lettering on the bottom & you have to make sure you are stuck well. If all the edges are not stuck down good on the glass the etching cream will seep under the contact paper & your letters will be blurred. THEN you will think 2 things: #1 Sam does not know what she’s talking about or #2 Your supplies are cruddy. However, you will not blame yourself!

Now comes the FUN part! Take your etching cream & smear it all over the glass in the areas where you removed the contact paper. It does not take much. As you can see, I was pretty liberal, but in truth, that is probably too much. After you have completed the ABOVE step.
Walk away from this project. Let it sit about 15 minutes.
Longer is better. Less is not.
Just LEAVE IT ALONE.

After about 15 to 20 minutes. Take it to the sink & wash it off with hot water. If you left the etching cream on to dry overnight, you have a LOT of washing to do! Once it is dried, it is really hard to get off. So? Do not let it sit overnight! Once the cream is all washed off, peel the contact paper off & wash with soap & water.

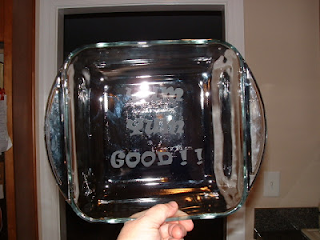
In addition, here is the finished product! (I could not get a good picture without the flash….sorry)

Another view of the finished product! I still have a big pan to do before Saturday. Good Luck & I would really like to see what you come up with!!
Materials: Glass Dish – Anchor Hocking in this demo 8 X 8 inches
Etching Cream
Exacto Knife
Contact Paper
Paint Brush – Or a foam brush – I used a Q-Tip in this demo
Blue Painters Tape
Sharpie
Popsicle Stick – or other tool to rub with…
Printed desired font. Don’t’ do anything vulgar – this stuff is permanent!

I use this etching cream. I bought it off eBay over many years ago. And it is a brown color. The color of the etching cream is not relevant. This is a pint. I will never EVER use it all. Everything I have read, including the warning label, says to wear gloves & eye protection. I figure if it is stored in PLASTIC it cannot be all that bad….however, Use good judgment & follow the manufacturer’s directions. I will not be held responsible for idiocy.

Exacto Knife. Nice sharp blade. It will cut fingers. I know this. Contact paper. I have & use CLEAR contact paper because #1 it is easy to trace on & #2 it’s what I had on hand. Pretty sure that this stuff that I am using is older than the etching cream because I bought it when the kids were covering books in High School & my youngest child is now 28….so this stuff has a pretty long shelf life.

Make sure that your WORDS are going to fit on the bottom OUTSIDE of the pan you are etching. See my example above. My example was a Christmas gift for my niece. She is young & I wanted something cutsie for her.

In order to get the words readable on the OUTSIDE of the bottom of the pan, you must trace the words BACKWARDS. Place your paper face down on the light box & tape. I used painters tape because it comes off with no residue. Cut a piece of contact paper larger than your paper & tape the contact paper on top of your printed paper. Make SURE that the shiny side is UP & facing YOU.


Peel the paper OFF the contact paper & place the contact paper ON the pan. Sticky side ON THE GLASS.

See? (below pic) Right Side Up!

Now, make sure you have GOOD lighting & take that super sharp exacto knife & start cutting out the letters. Go slow. Small strokes allow you to cut the teeny tiny pieces out. Use the tip of the knife to remove the contact paper.


Now comes the FUN part! Take your etching cream & smear it all over the glass in the areas where you removed the contact paper. It does not take much. As you can see, I was pretty liberal, but in truth, that is probably too much. After you have completed the ABOVE step.
Walk away from this project. Let it sit about 15 minutes.
Longer is better. Less is not.
Just LEAVE IT ALONE.

After about 15 to 20 minutes. Take it to the sink & wash it off with hot water. If you left the etching cream on to dry overnight, you have a LOT of washing to do! Once it is dried, it is really hard to get off. So? Do not let it sit overnight! Once the cream is all washed off, peel the contact paper off & wash with soap & water.

In addition, here is the finished product! (I could not get a good picture without the flash….sorry)

Another view of the finished product! I still have a big pan to do before Saturday. Good Luck & I would really like to see what you come up with!!

Sam
Tuesday, October 14, 2014
Long Lost Blogger
Not really, but I HAVE been busy!!
I entered 5 quilts in a local quilt show. Well - ALL the quilts were provided by the guild I am a member of. The guild members AND the public voted. It's been a while - like 6 years....since I have won anything (but you know you have to participate to win....) but guess what????
I won 2 ribbons!
1st place for machine pieced> machine quilted - Ocean Waves Quilt
2nd place for machine pieced & machine appliqued - Ryan's Butterflies.
I will post photos soon - but it might be this weekend, as by the time I get home there is NO natural light!
So excited taht I won! Surprised too as there is a lot of tough competition from my guild members you know!


 & machine quilted - Ocean Waves Quilt
2nd place for machine pieced & machine appliqued - Ryan's Butterflies.
I will post photos soon - but it might be this weekend, as by the time I get home there is NO natural light!
So excited taht I won! Surprised too as there is a lot of tough competition from my guild members you know!
M
& machine quilted - Ocean Waves Quilt
2nd place for machine pieced & machine appliqued - Ryan's Butterflies.
I will post photos soon - but it might be this weekend, as by the time I get home there is NO natural light!
So excited taht I won! Surprised too as there is a lot of tough competition from my guild members you know!
M


Monday, September 22, 2014
Sunday, August 3, 2014
Another Doll Dress
It is so fun to sew something SWEET & GIRLLY !!! And dolls don't complain!

 This is a really old pattern I have had for over 20+ years as I made dresses for my youngest daughter from this pattern & doll dresses to match! and she will be 29 this coming Tuesday.
I had to enlarge the pattern, as it was originally designed for the 18" American Girl Dolls. (which by the way...I restrung one with great success! Thank You "youtube"!!)
M
This is a really old pattern I have had for over 20+ years as I made dresses for my youngest daughter from this pattern & doll dresses to match! and she will be 29 this coming Tuesday.
I had to enlarge the pattern, as it was originally designed for the 18" American Girl Dolls. (which by the way...I restrung one with great success! Thank You "youtube"!!)
M


Thursday, July 31, 2014
Everlasting Wreath Progress
I brought this to work today so that I could have LOVELY assistants hold it up so I can get a few pictures. I put the blue painters tape on the edges (missed some!) to keep the paper intact - I NEED it to sew the blocks together and as many times as the blocks have to be rotated to be sew together - the paper is getting very fragile.
Ona side note: As my lovely assistants are holding htis up for me - a driver at the window asked me if it was HANDSEWN? I replied NO. He says.....wait for it..... "If it's not handmade, it's not a real quilt!" You know what my response was???? Yah? How many have YOU made? - He says I *helped* my grandmother make ONE. Yah - he KNOWS so much about quilts right??? That comment set me off, I'll tell ya!!!

 Ya'll Have A Good Day Now!
M
Ya'll Have A Good Day Now!
M


Friday, July 18, 2014
No, I DO NOT collect dolls..............
I do not collect dolls - I don't want any more dolls. I raised 2 girls, I have plenty of dolls. I made the teal colored jeans on the My Twinn Doll. I used a pattern for an 18" doll & enlarged it. the length is good, the waist is a little loose. (I made a pair for the 18" doll too and the jeans seem a little short & really hard to get on the doll) I did not make the pink cupcake shirt. I bought a baby onsie at Wal Mart for $2 and was going to remove all the seams & make a shirt, but it turns out that the fit is good enough and all I did was cut the snap area off & hem it up! In the foreground, at the big dolls feet is the pir of pink jeans that I made. As of yet, I have to put velcro on the fly & hem them.
 I did not make this DRESS. I brought the doll to be used as a model, my friend Diane (met at the quilt guild!) made the dress & is entering it in the next county fair. We wanted to see it ON a doll that the pattern is intended for. Her dress is adorable!
 Sometimes it's just nice to make something SWEET ! It's beenso long since I sewed little dresses for girls! But, do you know what's good about sewing for dolls? They just don't care. They don't complain. It's a WIN/WIN situation sewing for dolls!
Sam
Sometimes it's just nice to make something SWEET ! It's beenso long since I sewed little dresses for girls! But, do you know what's good about sewing for dolls? They just don't care. They don't complain. It's a WIN/WIN situation sewing for dolls!
Sam

Wednesday, July 16, 2014
When Quilt Bloggers Get Together...........
My VERY good friend Joan came to visit this week!
We have been freinds for a LOT of years. But we have only ever seen each other *in person* 3 times. I credit the internet for bringing us together. Had it not been for that, I would have never met her I think And I am VERY thankful that I did!
I am very blessed that I have a flexible work schedule that allowed me to work non-traditional hours on Monday & we attended my quilt guild metting on Monday afternoon after having lunch with a few of my guild friends.
And guess what??? Dumb-me failed to get any pictures of our visit. Not one. And yo know what? it didn't even occur to me to get pictures until ater Joan had already gone home. Darn it.
I sure hope that we get to visit again!
Thank you for your company Joan!
Sam
Sunday, July 13, 2014
SKUNK!
Two weeks ago my Bourbon got skunked.
Had to shave off all his hair. It took me 3 years to get it that long.............
Before the skunk


after the shave job...........

Monday, June 23, 2014
MOre PINCUSHIONS
I made this template - stapler remover used for size comparison only!

I used that template to cut out 12 wedges, I swed 6 together, and then sewed each circle to the other, right sides together. Found ti easier to leave an opening for turning & then subsequently sewing shut, on a seam between the wedges, rather than on the edge. (the curve was mor challenging to sew shut than a straight one!)
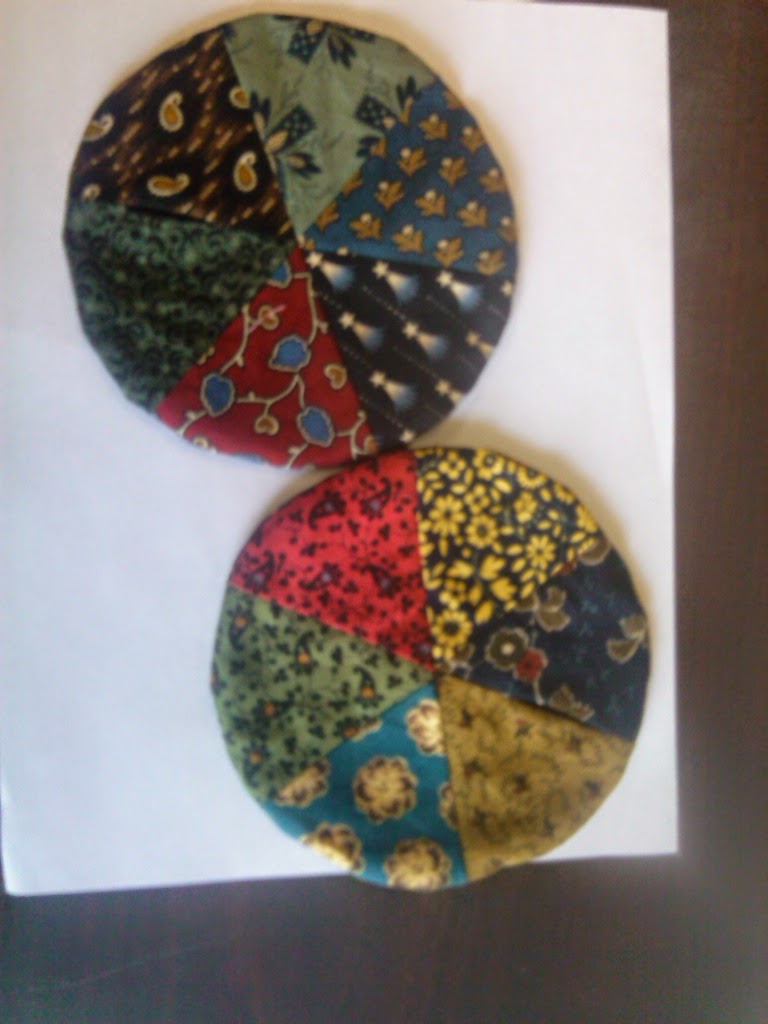
Then I stuffed them, and did some creative thread PULLING and created little flower pincushions. I have to admit, the one made of Civil War Repro's is my favorite!

M
I used that template to cut out 12 wedges, I swed 6 together, and then sewed each circle to the other, right sides together. Found ti easier to leave an opening for turning & then subsequently sewing shut, on a seam between the wedges, rather than on the edge. (the curve was mor challenging to sew shut than a straight one!)
Then I stuffed them, and did some creative thread PULLING and created little flower pincushions. I have to admit, the one made of Civil War Repro's is my favorite!
M
Thursday, June 19, 2014
An Apple A Day

I found some sort of "pattern" online by Mollie Makes (or something similar to that) I just didn't want to spend $8/$12 for a pattern for this! I knew if I looked long enough on the internet I would find something and I did!
I made this on Tuesday night - it was super late & I still lack putting a stem on it.
I really like tis little Apple Pincushion! Super cute. I would like to make a few more Apple's and a couple Pears too.
Oh! I nearly forgot.........I enlarged the pattern by 50%.
M
Monday, June 16, 2014
Little Quilts - Not the STORE, but the SIZE !!
Joan shared a link for a free pattern from another blogger's web page and I have used it a LOT lately. Y'all know I have a regular full time job. Sometimes it's really FULL. Like during the month end processes - so, in my defense, I can't make lots & lots of charity/donation quilts. But when I do? I crank them out!
Here are 7 that I am sending to a guild that will quilt them & hand them out as they see fit. I endorse what they do and they are happy to get them too.
I have a severe disadvantage of volunteers to hold up quilts while I take photos - so you're seeing these sideways, clothes-pinned to my dog kennel fence. You gotta work with what you got!


The 2 Owl Quilts are just started. They will go along with the other 5. I find it easier to do 2 simultaneously. Just seems more efficient. For me anyway!
M
Here are 7 that I am sending to a guild that will quilt them & hand them out as they see fit. I endorse what they do and they are happy to get them too.
I have a severe disadvantage of volunteers to hold up quilts while I take photos - so you're seeing these sideways, clothes-pinned to my dog kennel fence. You gotta work with what you got!
The 2 Owl Quilts are just started. They will go along with the other 5. I find it easier to do 2 simultaneously. Just seems more efficient. For me anyway!
M
Subscribe to:
Posts (Atom)