This is the "ironing station" in my new sewing room. The ironing BOARD is not new. I recovered it for the 4th time. I am pretty sure that THIS time around there are more staples in it than the 3 other times combined! I used my pneumatic upholstery stapler this time & it only took me around 40 minutes to compete the whole board.
So let me give you the breakdown of what you are seeing!
The cube storage base table is an 8-Cube IKEA Kallax unit. The 8 drawers in the bottom 4 cube spaces are 4 IKEA drawer inserts. My opinion is that if you bought those drawer inserts to use the drawers for clothing you have made a mistake! While they are PERFECT for my sewing room? They are very shallow & since they are inserts, they don't go the full 15.5" deep. Again, PERFECT for sewing notions! The knobs on the drawers were a bright silver little pencil shaped thing. I replaced them with IKEA kitchen knobs. The new knobs match everything better. The 4 big baskets are from Wal-Mart. They are the Better Homes & Gardens line, Philadelphia Basket - Medium. These baskets fit the cube really well & are more roomy than the IKEA baskets were.
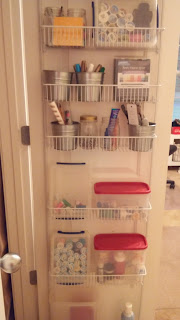
The buckets on the rod, while an IKEA product, are not new. Same as I had upstairs in my old sewing room. The shelf ABOVE the buckets IS new. I wanted a task light & somewhere to mount my radio. There are now 4 smaller baskets on that shelf (not pictured).
In order to get the ironing "station" to the right height, we built a 2"x4" base - painted high gloss white - and IKEA casters. Then topped with the ironing board. We screwed in runner type boards under the plywood ironing board to keep it centered on the Kallax cube unit. It hangs over farther on the front than the back. The IKEA cube unit is 58" long & 15.5" deep. The ironing board is 60" long & 25" deep. Once I got it where I wanted I screwed thru the runner (on the back side) & into the cube unit with about 3 drywall screws. Keeps it from moving. I put the casters on for 2 reasons. #1 to bring it up to counter height & #2 in case I want to move it. I'm NOT likely to be moving it, but it sure will be easier to move WITH casters, than without!

I ran an extension cord along the back side of the cube unit & secured it with Command Hooks for outdoor lighting. Little clear clips. The plug was on the left & I am right handed, so that's why the iron cord looks like it plugs in to the cube unit, it doesn't - I used command hook Velcro picture hangers to adhere the extension cord to the unit. I also used Command Hook cord "corral" hooks for the surge protector plug. Previously I'd have to bend over & turn off the surge protector. I plug EVERYTHING into the surge protector & then just turn it off & off everything goes! So this time I mounted it on the wall & I don't have to try & turn it off with my foot, or bend over. I just click the on/off switch at arm height. Sure like THAT feature!
It's still a work in progress. I have mountains of stuff to still move into my new sewing room, but it's a slow go. I don't have a deadline, and I'm OK with that!
Happy Sewing Y'all!
M


